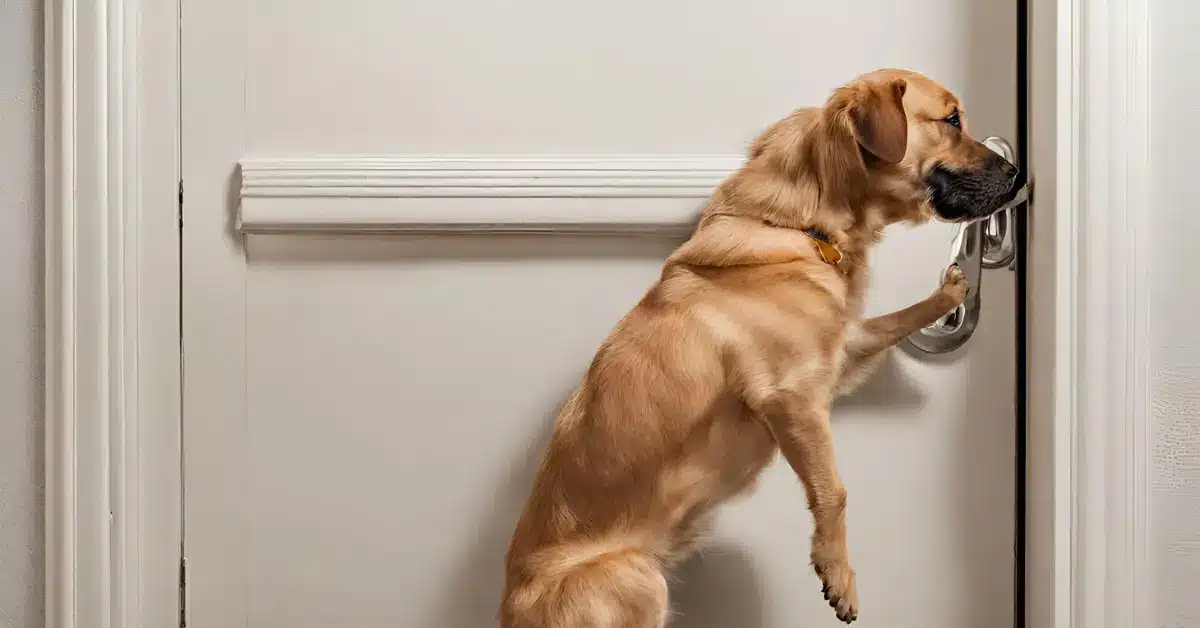
How to Fix Dog Scratches on Painted Door, start by sanding the damaged area and then apply a matching paint. Fill deeper gouges with wood filler before sanding and painting for a seamless repair.
Dealing with dog scratches on your painted door can be an irritating task for homeowners. Your door bears the brunt of daily activities and pet shenanigans, which can lead to unsightly marks and scrapes. Restoring your door to its former glory doesn’t have to be a daunting chore.
By employing simple DIY techniques, you can quickly repair minor damage and keep your doors looking pristine. The key lies in precise preparation and applying the right materials for touch-ups. Our tips will guide you through a straightforward process to ensure your repair work blends in seamlessly with the rest of the door, preserving the aesthetic appeal of your home’s entryway.

Introduction To Dog-inflicted Damage
Pets bring joy, but they can leave their mark in less delightful ways. Dogs, with their sharp nails, can scratch up your home without causing any harm. A common casualty is your painted doors. Understanding and fixing these marks ensures your home stays looking its best.
Understanding The Nature Of Scratches On Painted Surfaces
Scratches vary in size and depth. A door’s painted surface could have minor abrasions or deep gouges. The paint type and dog’s nails can affect the scratch nature. It’s key to recognize different scratch types to choose the best repair method.
Assessing The Extent Of Damage Caused By Dog Scratching
Assessing scratch severity is crucial before undertaking repairs. Here’s how to determine the damage level:
- Inspect the door in good light.
- Look for surface-level or deep scratches.
- Note the number of scratches.
- Feel the scratch depth with a fingernail.
Identifying the damage helps in applying the correct repair technique. As scratches range from light to heavy, the approach varies.
Preventive Measures To Protect Doors
Preventive Measures to Protect Doors from dog scratches save both time and money. Keeping doors looking fresh and new requires a proactive approach.
Training Your Dog To Avoid Scratching Doors
Training your furry friend plays a crucial role in maintaining your doors. Start early with basic commands like ‘sit’ and ‘stay’ to prevent scratching habits.
- Reward positive behavior with treats
- Use firm ‘no’ commands for bad habits
- Provide engaging toys for distraction
Consistent training sessions reinforce good behavior. Patience yields a well-behaved pet.
Using Scratch Guards And Other Protective Products
Scratch guards shield doors effectively. These transparent films or hardcovers stick on doors, preserving the paint.
| Product Type | Benefits |
|---|---|
| Plastic Films | Invisible protection, easy to apply |
| Metal Guards | Durable, scratch-resistant |
| Furniture Socks | Decorative, protects door knobs |
Other options include nail caps for dogs. They prevent scratches without hampering movement. Products are available in pet stores and online shops.
Essential Tools And Materials For Repair
Essential Tools and Materials for Repair are the bedrock of any successful do-it-yourself project. Whether it’s a minor touch-up or a full-on scratch cover-up, kicking off with the right equipment will make your repair job seamless and effective. Your playful pup may not know the chaos caused by those claw marks, but you’ll be able to restore your door’s pristine look with precision and ease.
Listing Necessary Supplies For Fixing Scratches
Before diving into the repair, gathering all necessary supplies is crucial. A handy list to start with includes:
- Wood filler or putty to fill in deep gouges
- Fine-grit sandpaper for smoothing out the surface
- Putty knife for filler application
- Cloth for cleaning the area
- Paintbrushes for detailed work
Choosing The Right Paint And Primer For Your Door
Picking the perfect paint and primer spells the difference between an obvious repair and an invisible fix. Here’s how to make the right choice:
| Paint Type | Usage |
|---|---|
| Water-based latex paint | For easy clean-ups and quick drying |
| Oil-based paint | For durability and a smoother finish |
Identify the existing door paint type and match it. Always choose a primer that pairs well with your paint. A compatible primer ensures better adhesion and longevity of your repair.

Surface Preparation Steps
Dealing with dog scratches on your painted door can be frustrating. Surface preparation steps are crucial for a flawless repair. Let’s dive into how to create the perfect canvas for the fixing process. Follow these guidelines for the best results.
Cleaning The Scratched Area Properly
First things first, a clean surface ensures strong adhesion for paint repairs. Start with:
- Dust off any debris using a soft brush or cloth.
- Create a mix of warm water and mild dish soap in a bucket.
- Use a sponge to gently wash the scratched area. Be thorough.
- Rinse with clean water to remove soap residue.
- Dry with a soft towel or let air dry completely.
Sanding Techniques For A Smooth Base
Smooth sanding is key to an invisible repair. Here’s how to sand like a pro:
- Choose a fine-grit sandpaper, like 220-grit, for minimal damage.
- Sand in the direction of the scratch to even out the surface.
- Use gentle, consistent pressure to avoid further damage.
- Continue until the area feels smooth to the touch.
- Wipe away any dust with a clean, damp cloth.
With these steps, you’re set for a smooth, paint-ready door.
Applying Wood Filler To Deeper Gashes
When deep scratches mar your painted door, simple touch-ups might not suffice.
Wood filler comes to the rescue for those gashes that seem a little more daunting.
Let’s dive into the steps for fixing those unsightly scratches with wood filler.
Selecting The Appropriate Wood Filler Type
- Pick a filler that matches your door’s color.
- Choose a stainable option if you plan to stain.
- Water-based fillers are easy to clean up.
- For durability, epoxy-based fillers work best.
Achieving A Uniform Surface With Filler Application
Apply the filler using a putty knife. Smooth it over to ensure the surface is even.
Let the filler dry as the manufacturer recommends.
- Fill the scratch slightly above the surface.
- Wait for the filling to dry completely.
- Use sandpaper to make it even with the door’s surface.
Wipe clean with a damp cloth to remove dust.
Once dry, you may paint to match your door’s finish.
Masking And Protecting Adjacent Areas
Before tackling those pesky dog scratches on your painted door, prepare the work area carefully. Masking and protecting surrounding surfaces is vital to achieve a clean, professional-looking repair job without unnecessary extra work.
Using Masking Tape For Precision
Masking tape is essential for precise paintwork. It’s simple to use and with straight edges, you stop paint bleed. Here’s how to apply it:
- Clean the door frame. Dust or grease reduces tape stickiness.
- Apply tape firmly along the edge of the area you’ll be working on.
- Press down the edges of the tape for a tight seal. This prevents the paint from sneaking underneath.
- Leave a bit of overlap for easy removal later.
Covering Hardware And Surrounding Paint To Avoid Damage
Door knobs and hinges can get damaged or stained during repairs. Protect them this way:
- Remove hardware if possible. If not, cover tightly with painter’s tape.
- Use plastic or newspaper around the door. Secure the perimeter with tape for total coverage.
- Review all taped areas for potential slip-ups.
Primer Application For Consistent Color
Imagine your painted door, sleek and shiny, until your furry friend scratches it. Priming makes those scratches disappear with ease. This base coat ensures the paint sticks well and looks even. Without primer, patches become visible, and your door won’t have that seamless appearance. Let’s get your door looking as good as new, starting with primer!
The Importance Of Primer In Scratch Repair
Primer acts like a magic eraser for those unsightly scratches. It fills up the gaps, creating a smooth surface for painting. It also seals the exposed wood, preventing moisture damage. Think of it as a protective layer that ensures vivid and lasting color on your door.
Step-by-step Guide To Applying Primer
- Clean the scratched area with a damp cloth and let it dry.
- Lightly sand the scratch and surrounding space.
- Wipe away the dust from sanding with a tack cloth.
- Apply a layer of high-quality wood primer over the scratch.
- Use a small brush for better control and precision.
- Allow the primer to dry completely before painting.
Wait for the primer to dry and you’re ready for the fresh paint!
Painting Techniques For Flawless Finish
Your four-legged friend might be your best companion, but dogs and pristine painted doors don’t go hand in hand. Dog scratches on painted doors are unsightly. The key to a seamless, undetectable repair lies in the right painting techniques. Achieving a flawless finish requires patience and precision. In this section, we cover how to expertly match your paint and apply it to make those scratches disappear.
Matching The Paint: Tips And Tricks
Getting the perfect paint match is essential for invisible repairs. Start with a sample of the existing door paint, if available. If not, peel a small chip of paint to take to the store. Use this for color matching. Here’s how to ensure a good match:
- Check the lighting: Paint can look different in various lights. Match your paint sample in similar lighting to your doorway.
- Finish matters: Remember, the finish (matte, semi-gloss, gloss) can affect the color. Choose the same finish as your door’s paint.
- Test before applying: Paint a small patch on the door or similar material to confirm it’s the right color.
Applying Paint Layers For Optimal Results
To apply paint effectively, multi-layering is key. Thin, even layers will yield the best finish. Here’s a step-by-step guide:
- Clean: Wipe down the scratched area with soapy water and dry completely.
- Prime: If wood is exposed, apply a thin layer of primer to help the paint adhere.
- Layer: Apply the first layer of paint. Let it dry fully.
- Sand: Lightly sand between layers for a smooth finish. Clean off any dust.
- Reapply: Add subsequent layers of paint until the repair blends with the surrounding area.
- Seal: Once completely dry, you might consider a clear topcoat for added protection.
Drying And Curing Time Considerations
After fixing those pesky dog scratches on your painted door, it’s crucial to let the paint dry and cure properly. This stage is often overlooked, but it ensures the longevity and durability of your repair work. The following insights will help you understand the process and protect the area as it dries.
Understanding Paint Drying And Curing
Paint drying is merely the solvent evaporating, leaving the paint feeling dry to the touch. Curing, on the other hand, is when the paint’s chemical compounds cross-link and bond, offering a hardened surface. Typically, drying may take a few hours, while curing can take up to a few weeks.
- Humidity and temperature greatly affect drying and curing times.
- Adequate ventilation can expedite the drying process.
- Time frames for drying and curing differ depending on the type of paint used.
Protecting The Repaired Area During Drying
Once the door has a fresh coat of paint, it’s important to protect it while it dries and cures.
| Time-frame | Precautions |
|---|---|
| First 24 hours | Avoid touching or using the door. |
| 24-48 hours | Keep the door closed gently if needed. |
| Up to 4 weeks | Limit cleaning the door’s surface to avoid marks. |
Use gentle tapes like painter’s tape if you need to cover the area. Be mindful that pets or objects do not brush against the paint too soon. Signs alerting others to keep clear can be helpful.
- Signage can remind household members to be careful.
- Barriers might keep pets away from the work area.
- Routine checks can ensure the drying process is undisturbed.

Final Touch-ups And Quality Check
After repairing dog scratches on a painted door, the final touch-ups and quality checks are crucial. They ensure the door looks as good as new. Let’s inspect the door for consistency and correct any remaining imperfections with a detailed finish.
Inspecting The Repaired Door For Consistency
Once the main repairs are complete, take a step back. Look at the door from different angles. Check the paint’s evenness and surface smoothness.
- Search for missed spots or uneven paint.
- Feel the surface for any bumps or rough patches.
- Compare the repaired area with untouched sections.
For a consistent sheen, shine a light across the surface. This will reveal imperfections.
Correcting Imperfections With Detailed Finishing
If you find inconsistencies, precise finishing techniques will help. Use fine-grit sandpaper to smooth out rough areas.
- Sand lightly to avoid removing too much paint.
- Clean the area with a damp cloth to remove dust.
- Apply a thin coat of paint if needed.
- Allow the paint to dry completely.
With a keen eye for detail, ensure the door looks uniform. The repaired sections should blend seamlessly with the rest.
Remember, finding and fixing every small error is the key to a flawless finish.
Reinstallation Of Door Hardware
Once those pesky dog scratches are out of sight and the fresh paint on your door dries, reinstalling door hardware is the next step. This step ensures your door not only looks good but functions perfectly too.
Reattaching Handles And Locks After Paint Job
After the paint job, reattaching the door handles and locks carefully is crucial. Follow these steps:
- Line up the handles with the holes in the door.
- Insert any screws or plates that hold the handle in place.
- Tighten screws using a screwdriver, make sure not to over-tighten, which could strip the screws.
- Check the handle’s operation by turning it back and forth.
- Re-insert the lock mechanism, ensuring it aligns properly with the handle and door frame.
- Secure the lock with its screws, and test the key several times.
Ensuring Proper Function And Fit Of Door Features
Ensuring proper function and fit of door features is essential for security and usability. Here’s how to make sure everything works:
- Inspect the strike plate alignment with the latch bolt on the door frame.
- Adjust the strike plate if it’s misaligned by loosening the screws and repositioning as necessary.
- Test the door knob and lock multiple times to confirm smooth functioning.
- Check the door closure by opening and closing the door, ensuring there’s no sticking or difficulty in the movement.
- If there’s an issue with fitting, gently file down the areas of friction.
Maintenance Tips To Prevent Future Scratches
Maintaining your painted doors is key to making them look new. It also helps prevent dog scratches. Let’s look at how to keep your doors in top shape.
Regular Door Maintenance Routines
Sticking to a routine keeps doors looking their best. Try these tips:
- Wipe down doors weekly to remove dirt and grime.
- Inspect for early signs of damage or scratches.
- Apply touch-up paint to small nicks to avoid rust on metal doors.
- Use furniture polish on wooden doors to maintain the finish.
Checking hardware is also crucial.
- Tighten loose hinges to avoid sagging.
- Lubricate them to ensure smooth opening and closing.
Long-term Solutions For Keeping Doors Scratch-free
Consider these more permanent protection solutions:
- Install a Door Protector
- – It’s a clear film that guards the door from claws.
- Use Scratch Shields
- – They’re acrylic panels that attach to the lower part of the door.
- Add a Pet Gate
- – It prevents dogs from reaching the door altogether.
Training your dog also plays a part.
- Teach them claw-friendly activities.
- Provide their scratch-approved area.
Regular maintenance and long-term strategies work together. They keep your painted doors scratch-free, adding to the beauty and value of your home.
How To Fix Dog Scratches On Painted Door Frequently get this question.
Can Dog Scratches On Doors Be Easily Repaired?
Yes, dog scratches on painted doors can often be repaired with some simple DIY methods. Minor scratches may only require a bit of sanding and touch-up paint.
What Supplies Are Needed To Fix Scratches From Dogs?
How to fix Dog Scratches on a Painted Door, you’ll need sandpaper, wood filler, paint, and a paintbrush. A matching paint color is essential for seamless repair.
How To Prevent Dogs From Scratching Doors?
Preventing dogs from scratching doors can involve training, providing scratch posts, and using protective barriers. Deterrent sprays and nail caps for dogs are also effective solutions.
Can I Fix Deep Scratches On A Painted Door Myself?
Deep scratches on a painted door may require more effort but can be fixed at home. Wood filler, sanding, and careful painting can restore the door’s appearance.
Conclusion
Wrapping up, and fixing dog scratches on painted doors is simpler than you might expect. With the right tools and techniques, you can restore your door’s appearance effectively. Remember, patience and precision are key. Your furry friend’s mishap doesn’t have to be a lasting blemish on your home’s aesthetic.
Keep these tips handy for a scratch-free, welcoming entrance.

