
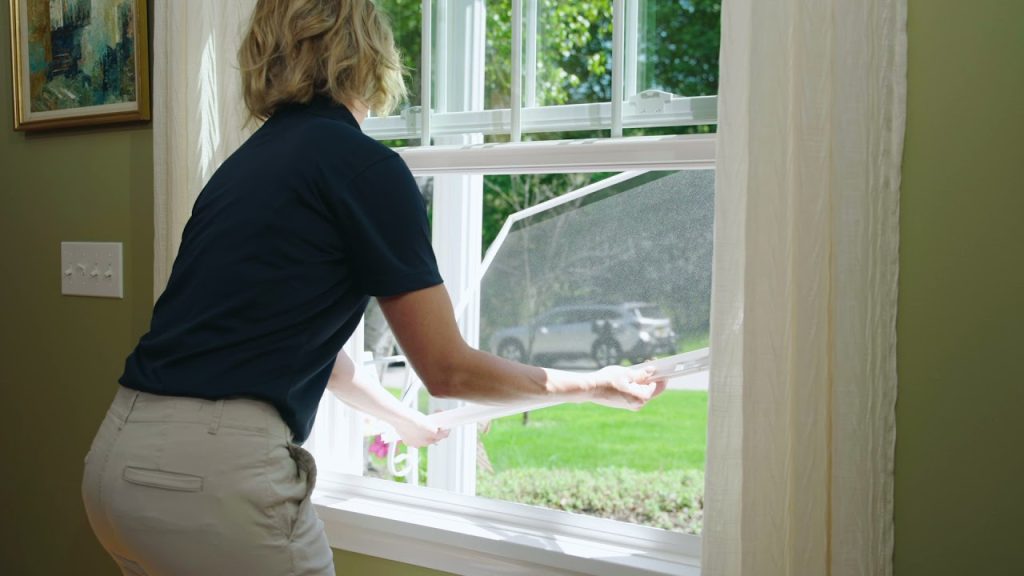
How to Remove Andersen Windows for Cleaning, unlock and tilt the sash inward. Release the sash from the frame by pressing the wash assist tabs.
Cleaning Andersen windows is a seamless process, designed for easy maintenance and to ensure a clear view. Homeowners appreciate keeping their windows spotless, and Andersen’s design caters to that by making the removal process straightforward. Regular cleaning not only enhances the appearance of your home but also extends the lifespan of your windows.
Andersen windows come with a tilt-to-clean feature, particularly convenient for those hard-to-reach spots. The focus is always on simplicity and safety, allowing for routine cleaning without the need for special tools or professional help. Emphasizing these practicalities, Andersen has created a user-friendly experience that aligns with the upkeep needs of modern homeowners.
Introduction To Andersen Windows And Maintenance Basics
Andersen windows reflect durability, energy efficiency, and elegant design. These windows enhance your home’s aesthetic and functionality. A key to their longevity is routine care.
Understanding The Andersen Window Design
Andersen windows come in multiple styles, including casement, double-hung, and gliding. Their unique build allows for easy removal during cleaning.
- Tilt-Wash: for impeccable glass access.
- Removable Sash: simplifies cleaning.
- Perma-Shield: protects frames against harsh weather.
Importance Of Regular Cleaning And Maintenance
Keeping Andersen windows clean extends their life. Visibility and home value increase with well-kept windows. Dirt accumulation may lead to window damage.
Regular maintenance tasks include:
- Inspecting for wear and tear.
- Washing glass with mild soap.
- Cleaning tracks and frames.
- Lubricating moving parts.
Preparation For Cleaning Andersen Windows
Clean windows can transform the look of your home. Preparing to clean Andersen windows ensures a smooth and safe process. Let’s get ready to make those windows sparkle.
Gathering The Necessary Tools And Materials
Gather the right tools before you start. Here’s what you’ll need:
- Cleaning solution specific to window cleaning
- Soft, lint-free cloths or microfiber towels
- Vacuum with a soft brush attachment
- Flathead screwdriver for certain window types
- Plastic tarp or drop cloth to protect your floor
Some Andersen windows require a screwdriver to remove. Check your window type before starting. Secure the right tools to avoid delays.
Safety Precautions And Protective Measures
Cleaning windows involve risks. Take these precautions to stay safe:
- Wear non-slip shoes to prevent falls
- Use gloves to protect your hands from sharp edges
- Remove jewelry to prevent snags or scratches
- Ensure window area is clear of trip hazards
- For upper floors, have someone spot you as you work
| Tool/Material | Use |
|---|---|
| Cleaning Solution | For glass and frame cleaning |
| Microfiber Towels | To wipe without lint |
| Vacuum with Brush Attachment | To clean screens and tracks |
| Flathead Screwdriver | For removing windows when needed |
| Drop Cloth | To protect flooring |
Follow these steps and prepare thoroughly for a hassle-free cleaning.
Step-by-step Guide To Removing Andersen Windows
Clean windows enhance your home’s beauty and let in more sunshine. Removing Andersen windows for cleaning is easy with our guide. It helps you maintain clear views and enjoy fresh air.
Identifying Andersen Window Types
Start by knowing your window type. Andersen windows come in various styles like double-hung, casement, or sliding. Check for a model number on the lower corner, or visit the Andersen website for help.
Detailed Instructions For Removing Windows
- Prepare the Area: Move furniture away, and lay down a soft cloth.
- Open the Window: For double-hung windows, slide it up; for casement, crank it open.
- Lift Out the Sash: For double-hung, tilt and lift the window sash out. For casement, remove the hinge screws.
- Slide or Remove: Sliding windows come out by pushing up and pulling the bottom in.
| Window Type | Removal Steps |
|---|---|
| Double-Hung | Tilt and lift out sash |
| Casement | Open and unscrew hinge |
| Sliding | Push up and pull in bottom |
Troubleshooting Common Removal Issues
If windows stick or won’t lift out, check for paint sealing the sash or debris in the track.
- Cut any paint with a utility knife carefully.
- Vacuum out any dirt or debris from the track.
- Apply silicone spray to lubricate the track.
Always support the window sash as it’s removed, to prevent injury or damage.

Cleaning Techniques For Andersen Windows
Keeping Andersen windows spotless enhances not just the clarity of your view but also the aesthetic appeal of your home. Regular cleaning is crucial, but the correct approach ensures both efficacy and safety. Below, discover the finer points of caring for these windows.
Cleaning Solutions And Methods
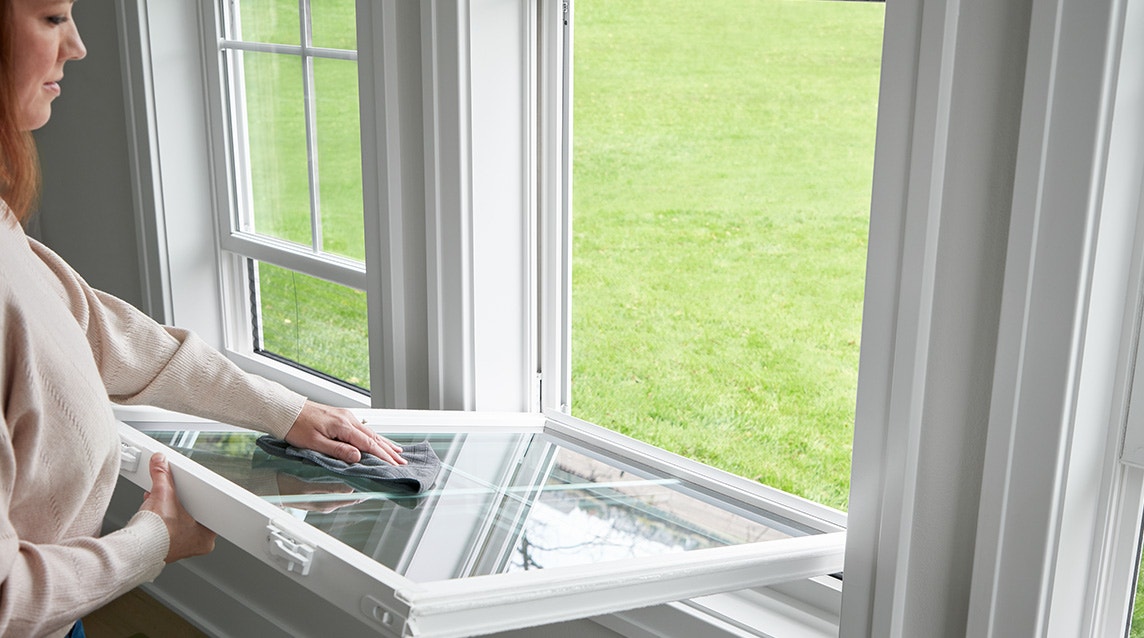
Begin with the right cleaning solution. A mix of mild dish soap and water works well. Avoid harsh chemicals that can damage the windows. Use a soft cloth or sponge to gently remove dirt without scratching the glass.
| Material | Cleaner | Tool |
|---|---|---|
| Glass | Soapy water | Soft cloth |
| Frames | Vinegar solution | Non-abrasive sponge |
Tips For Streak-free Glass
For streak-free glass, dry the surface with a lint-free towel. Clean on a cloudy day as direct sunlight can cause the cleaning solution to dry too quickly, leaving streaks.
- Wipe in a Z-shaped motion to avoid streaks
- Use a rubber squeegee for a smoother finish
- Apply a homemade solution of vinegar and water for extra shine
Cleaning The Frames And Sills
Frames and sills collect dust and dirt over time. Use a gentle brush to remove loose debris. Wipe down with a soft cloth dipped in a vinegar and water solution. Always dry frames and sills to prevent water damage or mold growth.
- Brush off loose dirt
- Clean with vinegar solution
- Dry immediately with a soft cloth
Reinstalling Andersen Windows After Cleaning
Putting your Andersen windows back in place after a good clean is straightforward when you follow the right steps. This section guides you through reinstalling your windows with care to make sure they’re correctly aligned and functioning properly. Let’s bring those sparkling clean windows back home and ensure they operate smoothly!
Ensuring Proper Alignment And Fit
Proper alignment ensures your windows function smoothly. Here’s how to realign your Andersen windows:
- Place the window back into the original frame carefully.
- Align the window sashes with the frame tracks on each side.
- Slide the window up and down to ensure it fits without resistance.
- Check for an even gap between the sash and frame to confirm alignment.
- Bolt the window locks to secure the window in its place.
Safety Checks And Functional Testing
Once the window is in place, safety and function checks are a must. Here’s a checklist:
- Inspect the locks to confirm they engage and release properly.
- Make sure the safety stops slide into position without fuss.
- Open and close the window several times to test for smooth operation.
- Ensure weather stripping is intact to prevent drafts.
- Confirm the sash moves freely, without sticking or jamming.
Remember, a well-reinstalled Andersen window provides smooth operation and maintains the effectiveness of your home’s insulation. Take the time to go through each step diligently. Happy cleaning and reinstalling!
Maintenance Tips To Prolong The Life Of Andersen Windows
Caring for Andersen windows extends their lifespan and ensures they look great. Simple steps keep these windows in top condition. Follow these maintenance tips to keep windows operating smoothly.
Regular Maintenance Schedule
Stick to a regular cleaning routine for lasting Andersen windows. Here’s what to do:
- Clean glass at least twice a year.
- Inspect weatherstripping and hardware annually.
- Check for smooth operation and apply lubricant bi-annually.
Addressing Common Problems
Handle Andersen window issues promptly. This avoids further damage and costly repairs. Look out for these:
| Problem | Solution |
|---|---|
| Sticky Windows | Clean tracks and apply lubricant |
| Water Leaks | Check and replace weatherstripping |
| Foggy Glass | Consult Andersen for glass solutions |
Perform these tasks consistently to minimize common window problems. Ensure your Andersen windows function beautifully for years.

Frequently Asked Questions On How To Remove Andersen Windows For Cleaning
How Do You Open Andersen Windows For Washing?
To open Andersen windows for cleaning, unlock and slide open the sash. Locate wash assist tabs or release latches, usually at the top or bottom, engage them, then tilt the sash inward. Follow specific model instructions for safe and proper operation.
How Do You Remove A Window For Cleaning?
To clean a window, first unlock and raise the bottom sash. Press both tilt latches inward and gently tilt the sash toward you. Remove the sash if necessary. Clean the glass, then reverse the process to re-install the sash and lock it securely.
How Do You Clean The Inside Of An Andersen Casement Window?
Open your Andersen casement window to its fullest extent. Wipe the interior frame and glass with a mixture of mild soap and water. Rinse with clean water and dry with a soft cloth to avoid streaks. Repeat if necessary for optimal clarity and cleanliness.
How Do I Open My Windows To Clean Them?
To clean your windows, unlock the sash and slide them open. For tilt-in types, pull tabs inward, and tilt the window down. Always consult your window’s manual, as methods may vary by design and manufacturer. Use caution to prevent damage or injury.
Conclusion
Removing Andersen windows for cleaning need not be a daunting task. By following the outlined steps, you’ll achieve spotless windows effortlessly. Regular maintenance ensures longevity and clarity. Remember, proper technique is key to avoid damage. So, grab your tools, and let the sunshine in through pristine windows.